
Introduction
This article is part of our first print instructions for those who are using Palette in Accessory Mode.
Video Overview
-
-
Slice this calibration keychain in CANVAS or use Chroma if you'd like to use Simplify3D, Cura, KISSlicer, Slic3r/PrusaSlicer instead of CANVAS.
-
With the project open, select the Palette model and toggle the accessory mode option.
-
Colour the model by dragging and dropping your colour onto the STL filenames. For a tutorial on how to prepare a file in CANVAS, please see here.
-
Please do not resize the keychain or use the Paint feature.
-
Use a transition tower, do not use side-transitioning or other transitioning method.
-
After slicing in CANVAS is complete you will have two files. The first is a MAF file that is meant for Palette. You'll also receive a modified GCode file for your printer. Transfer the MAF to Palette's SD card and then transfer the modified GCode file to your printer.
-
-
-
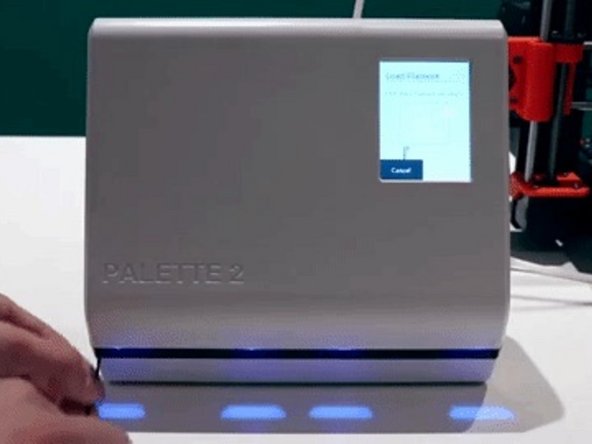
Turn on Palette and select Start Print.
-
On the top left corner of the screen, you can select to load a file from Palette's SD card (MAF file).
-
Palette will recognize that this first time you have used it with this printer and will be really excited and let you know before you start the print. Please go ahead and tap Next.
-
-
-
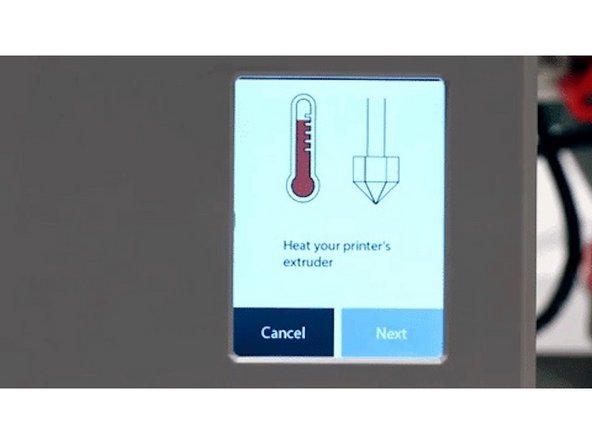
Follow the on screen instructions to clear filament from the outgoing tube and to load filament into the inputs.
-
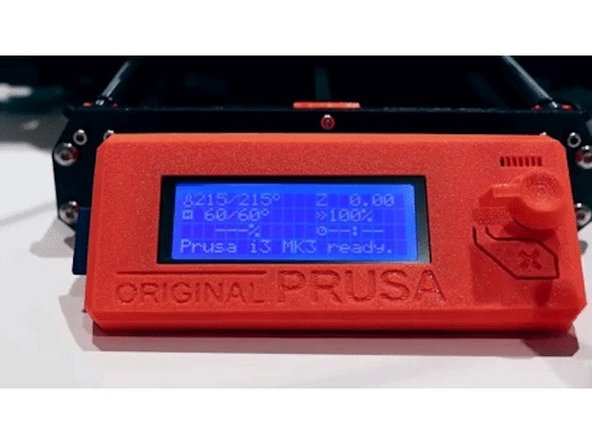
Pre-heat your printer's extruder.
-
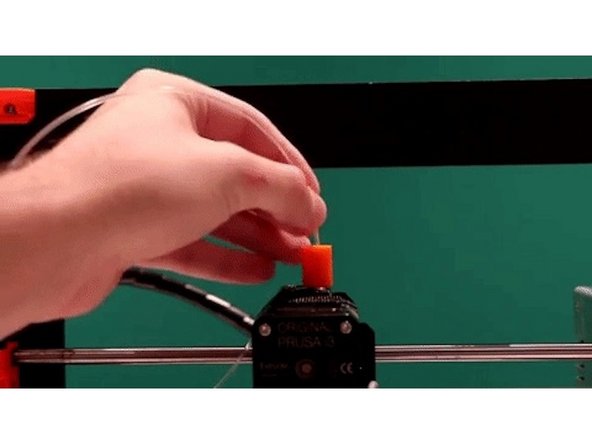
Load 5-10 cm of clear or white filament into your printer's extruder. This is not filament from Palette, but a separate piece of filament to prime the nozzle.
-
Please make sure that the filament you will be loading into Palette is not clear or white. This will help purge any residue or leftover filament from the previous print, and make it easier to see the color transition from the nozzle.
-
-
-
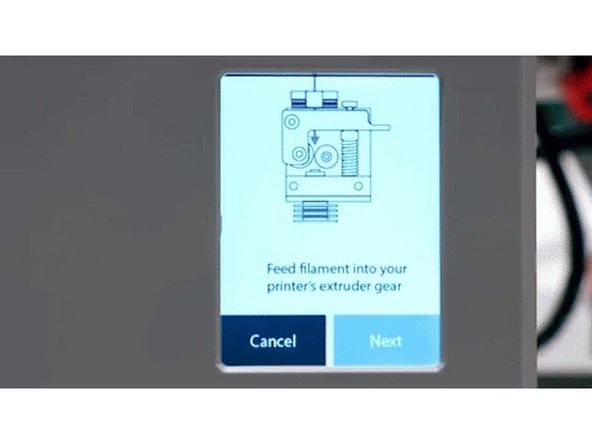
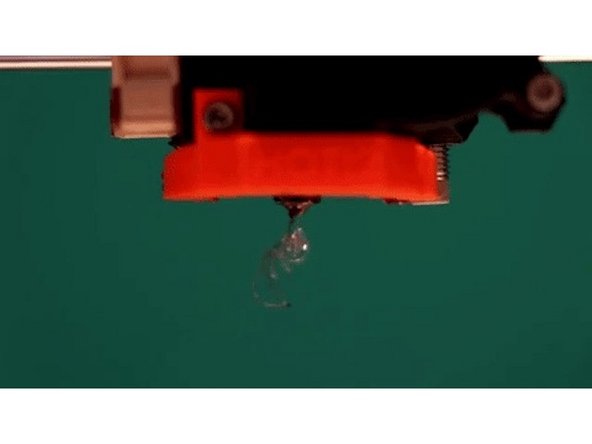
Palette will begin to create filament, and you will see it pass through the output and through the Teflon tubing.
-
Palette will create enough filament so that an additional 6-8 cm (2-3 inches) will stick out from the tubing. You can then feed this filament into your printer's extruder. The goal is the ensure that the gears are gripping the filament, so only a few millimetres will need to be loaded.
-
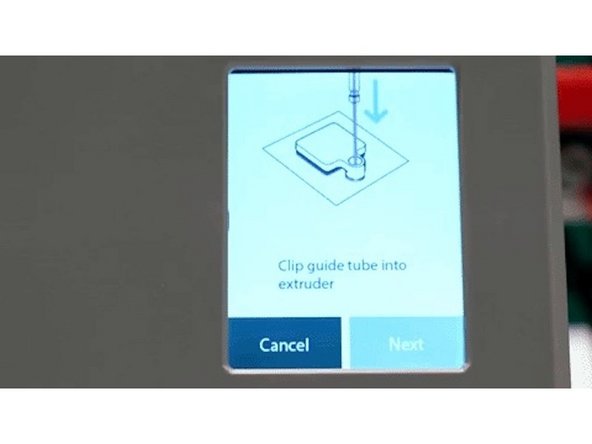
With the Teflon tubing connected, attach the Teflon tube clip to your printer's extruder using the provided Velcro squares. For variations of the Teflon Tube clip (including the MK3 one seen in the video), see here.
-
-
-
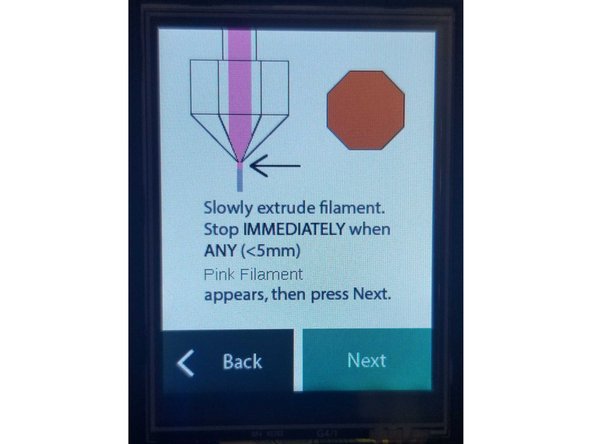
Jog the filament through your extruder until the new colour appears. The clear filament you loaded previously will eventually change to the colour from Input 1. Stop extruding as soon as you see any hint of the filament from Input 1 appear, and confirm loading is complete on Palette's screen by selecting Next.
-
When you're ready to start the print on your printer, select Finished. Please don't use an auto-loading function, as this step requires manual extrusion.
-
Start the GCode file from your printer's screen/controls. Once the print has started you will see a status screen displaying the time progress, splices completed, and total length of filament for the print.
-
-
-
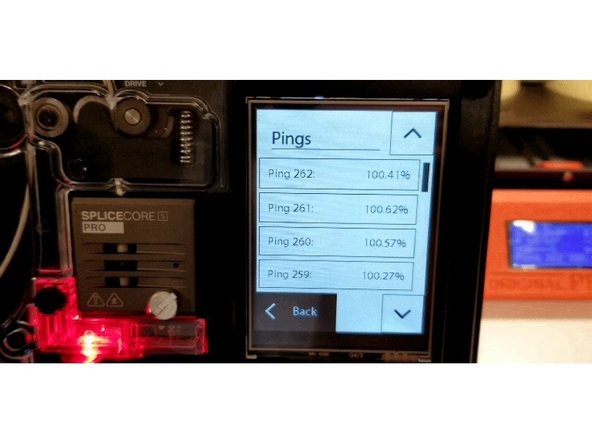
Once your print has started, please check your ping data and if possible, take a photo. If anything goes wrong during the print, this data will help us diagnose the issue. If you'd like to learn more about pings and what they mean, check out this article.
-
Once the print is completed, Palette's screen will confirm the print's completion. Tap Finished to end and Palette will record the calibration values for your specific printer.
-
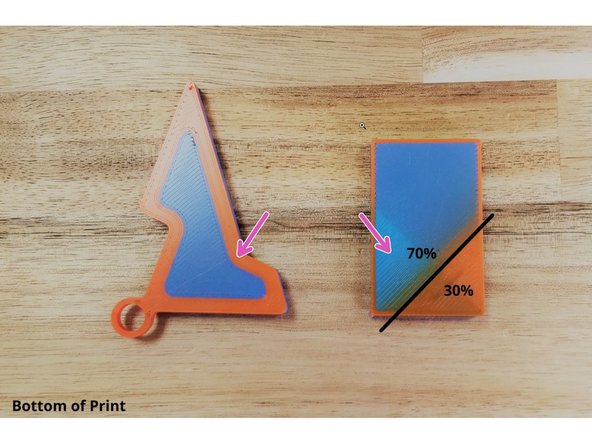
The print is considered successful if 1) the bottom of the keychain print has clearly defined colored regions. 2) the bottom of the transition tower also has a clear color change.
-
Please see here for more details on how to evaluate the first print.
-
-
-
On Palette, printer profiles can be viewed under Settings > Preferences > Printer Profiles. After completing the keychain you should have an LO (loading offset) and HM (historical modifier) saved.
-
To continue tuning the printer profile, print small to medium sized models that have at least 15 pings after slicing. After the print completes, save or ignore the print data to tune the HM, which is the average of pings over time.
-
Palette uses machine learning using ping data from each print, to get better with every print.
-


If you have any additional questions, please send us a message at support@mosaicmfg.com.
If you have any additional questions, please send us a message at support@mosaicmfg.com.
Cancel: I did not complete this guide.
7 other people completed this guide.

2 Comments
So if you have a bowden printer with a bowden tube length of literally 1200 to 1500 mm, are you really jogging through 1500mm of filament? I’m trying to come to terms with this, to understand how this is in any way feasible.
Hey Sean, if you have a Bowden tube, we would suggest pushing the filament through the tube manually first, and then when it gets close to the extruder, jog via your printer screen.
Alina -