
Introduction
A splice tube may need to be replaced if:
- A filament jam cannot be removed by any of our recommended methods.
- The splice tube is no longer capable of producing splices with diameters in the range of 1.6mm-1.9mm despite additional splice tuning.
The Splicer Tube is replaced to help avoid possible splice issues, as the Teflon tube can degrade after exposure to heat for prolonged periods. It's time to change the Splicer Tube if you find that your splices are necking continuously or seem very thin and weak. We recommend using filament that is within +/- 0.03 mm spec of 1.75 mm to create the best quality splices.
Tools
No tools specified.
Video Overview
-
-
Turn Palette 2 off and remove the top lid by gently lifting from the sides. Ensure Splice Core is cool before completing the following steps.
-
Remove the buffer plate by loosening the thumbscrews and lifting the plate.
-
Rotate the cutter wheel so that it is blocking the filament path.
-
If you have filament stuck in the Splice Core, you'll need to remove the acrylic homing cover that sits between the Splice Core and cutter wheel. Simply loosen the thumbscrew holding this cover to the substructure.
-
-
-
Loosen the thumbscrew holding the Splice Core. This thumbscrew is longer than the others (14 mm).
-
When removing the Splice Core, please note that there is an opening underneath where the fan sits. Please avoid dropping anything into this opening as this may damage the fan when powered on.
-
-
-
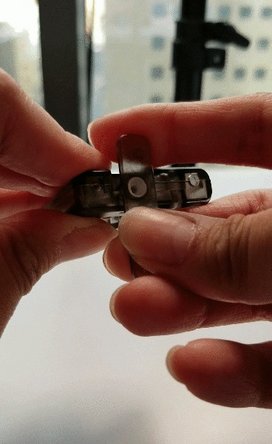
Once the Splice Core is free, you'll notice that there is a tab on one end. Turn and pull the tab, which will expose the Teflon tube.
-
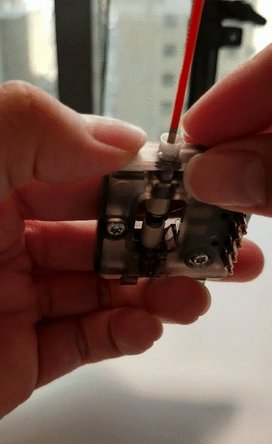
Push the tube out through the tab. Prepare a new Teflon tube by inserting a piece of filament or rod into the Teflon before reinstalling. This will help prevent any buckling or damage to the tubing.
-
After the Teflon tube is reinstalled, reverse the steps above and replace the Splice Core.
-


If you have any additional questions, please send us a message at support@mosaicmfg.com.
If you have any additional questions, please send us a message at support@mosaicmfg.com.
Cancel: I did not complete this guide.
2 other people completed this guide.

6 Comments
I am trying to replace the splice tube in my palette 2 pro, and I can't get the new tube (or the old tube) to go in. It goes about halfway, and stops. I cant get it to go any further. Help!
Hi Duane, do you have another tube that you can try? Also, are there any indents on the head of your splice tubes?
are the 2pro and 2S pro tubes the same?
Hey Paul, no, they are different tubes.
where can we found splicer tubes?