
Introduction
This guide for students shows how to access, create and submit your project in Canvas EDU.
The instructions for project creation and settings are simplified - for all our in depth Canvas resources, visit our Canvas homepage.
Contact us at support@mosaicmfg.com with any queries or issues!
-
-
Use the link (and password, if applicable) provided by your course facilitator to access the submissions folder. Enter the name for your submission, and email address.
-
You will receive an email with a separate link to access your individual submission.
-
-
-
Upload your .stl file(s) with the 'Add models' button
-
Use either the ‘single material upload’ option, or ‘multi-material upload’ for multiple .stl files that should be grouped into one model
-
-
-
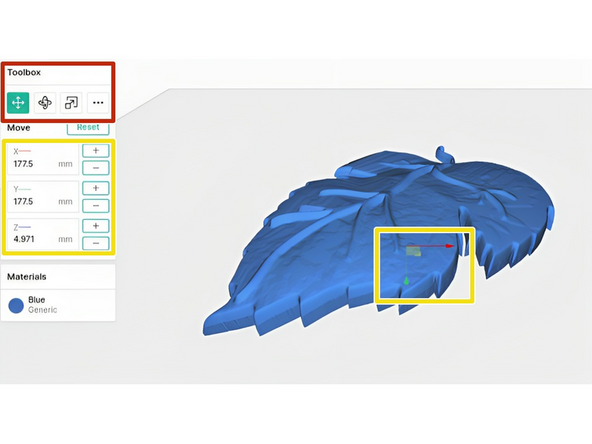
Select the model and use the position, scale and rotate tools in the Toolbox on the left
-
Use either the ‘+’ and ‘-’ buttons to alter the model incrementally, or use the red/green/blue arrows on the model to stretch and alter the model as desired
-
-
-
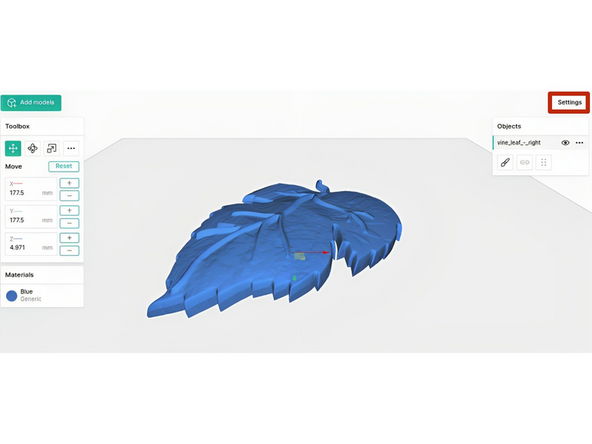
Click on ‘Settings’ in the top right to adjust project settings
-
Your course facilitator will have selected which settings you are permitted to adjust in your project
-
-
-
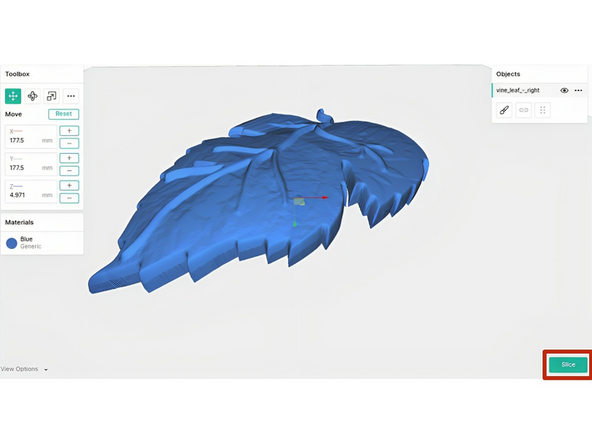
Use the 'Slice' button in the bottom right to slice your project
-
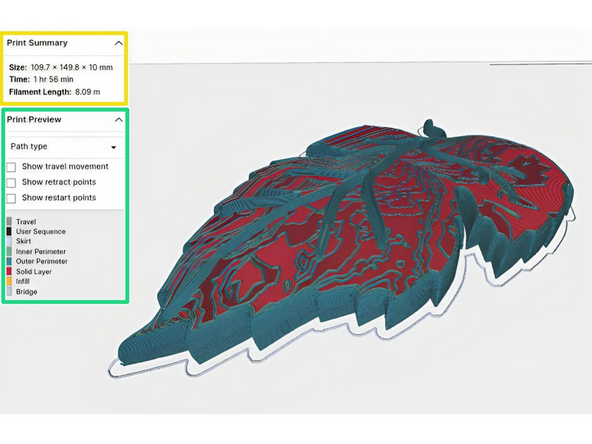
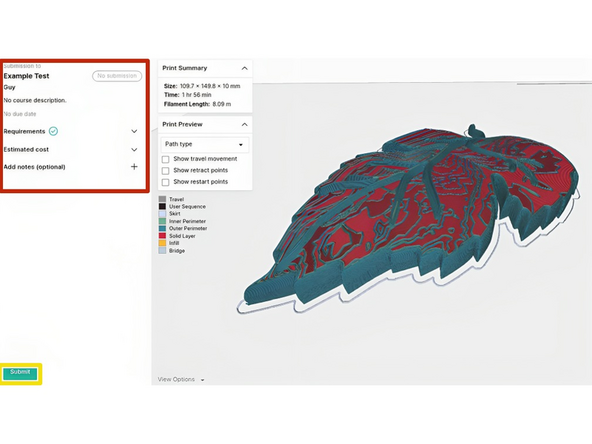
Check the print size, time and filament length in Print Summary box
-
Preview the toolpaths and other features in the Print Preview box
-
Check for any mistakes or errors on the model - if needed you can use a repair tool on the stl file before uploading it again
-
-
-
Check that your project has met all the submission requirements in the Submission panel on the left
-
Click ‘Submit’ in the bottom left to submit your project
-
You’ll receive an email notification when it is accepted or rejected, or any feedback is provided - use the same link as in step 1 to access the feedback
-


If you have any additional questions, please send us a message at support@mosaicmfg.com
If you have any additional questions, please send us a message at support@mosaicmfg.com

Team
