
Introduction
This resource is intended to cover preparing the printer, slicing, and starting a print on Element.
In this guide you will learn how to:
- Install and prepare bed surface
- Load filament using a Material Pod
- Slice for Element and send print to device
- View printer controls on Canvas device view
- Start a print
- Print removal
If you have the bed and Material Pod already installed on Element, and Element printer profile created, skip to step 10.
Tools
Parts
No parts specified.
-
-
First ensure that you have the correct bed type for your print. The label on the front-right side of the print bed shows which type of print bed it is. This label also provides a unique serial number to help identify a specific bed.
-
Type II beds are compatible with PEEK, PEKK and PEI 9085 filaments. Type I beds are compatible with all other filaments.
-
-
-
Lift the bed sheet and rest its back end against the end stops at the back of the bed area.
-
Align the sides and lower the bed sheet into position. It will be gripped magnetically.
-
-
-
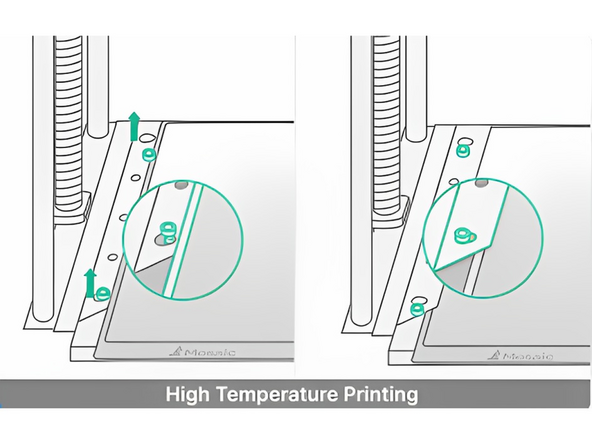
When printing with Type II beds for high temperature printing, move the skis inwards to hold the bed in position and prevent warping: use a 2.5mm Hex/Allen key to loosen the bolts slightly, and push the skis inwards, then tighten the bolts again.
-
When printing with Type I beds, ensure that the bed is not sitting on top of the skis
-
Before removing the bed, move the skis outwards again.
-
-
-
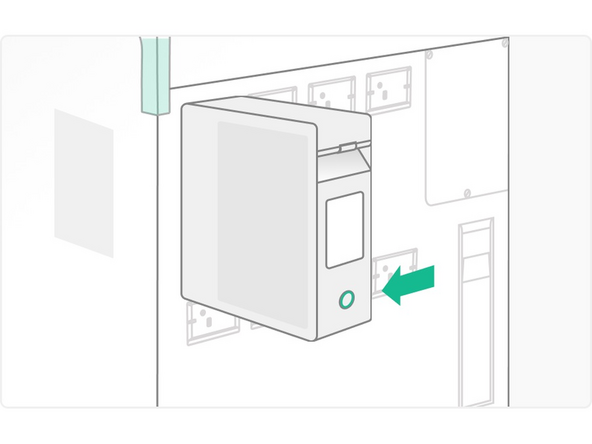
Detach Material Pod from Element if it was previously attached.
-
Press the button on the back of the Material Pod. The light will turn green when it is ready to be removed
-
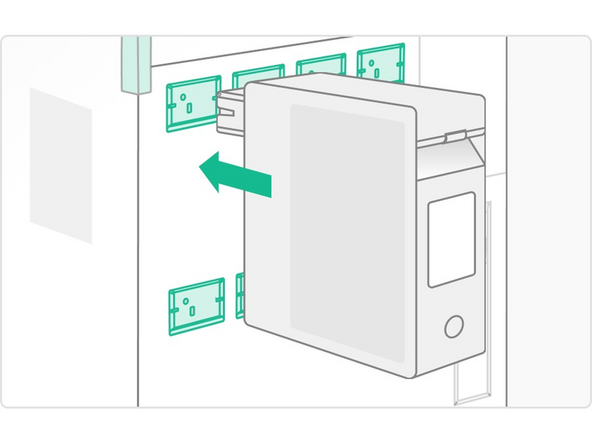
Holding the base of the Material Pod with one hand, use your free hand to press the lever inside the handle to release the Material Pod, sliding backwards from Element
-
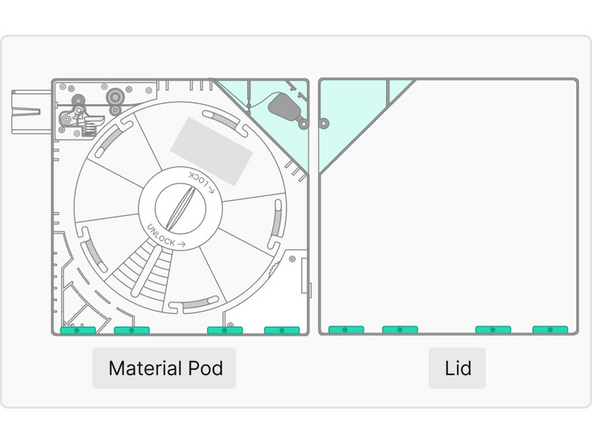
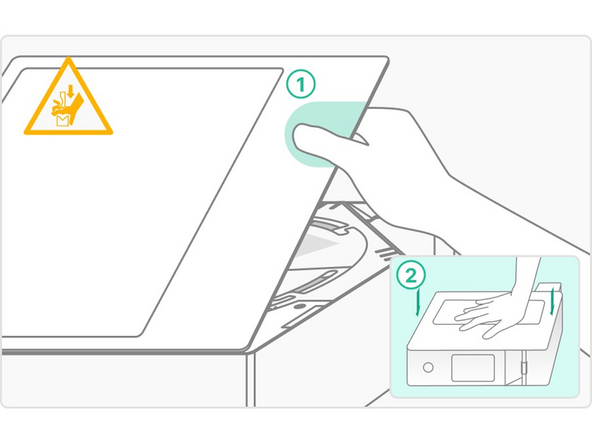
Open Material Pod by pulling up on the lid near the handle
-
Strong magnets are used along the Material Pod edges. Hold the lid firmly.
-
-
-
Find the end of the new spool and load it into the Material Pod drive system at the spot marked by a triangle. Continue loading while pressing down the green drive arm
-
Insert the filament until the tip is in the “Load to Here” area. Ensure it is between the two white lines
-
Put the spool into the Material Pod. Ensure that the filament is coming off the spool and towards the drive mechanism in a counter-clockwise direction. The filament should feed around the top of the spool into the Material Pod drive system. The system will not function correctly if the spool is installed in the wrong orientation
-
Mosaic Spools Place the green spool lock into the center post of the Material Pod, and turn it clockwise a quarter of a turn to lock it in place
-
Third-Party Spools Place the white spool locking nut over the center post of the Material Pod, and rotate it clockwise to secure the spool in place. Ensure the nut is turned until it is snug so that the spool and turntable spin together. Then, place the green spool lock over the locking nut, and turn it a quarter turn to lock it in place
-
-
-
Ensure the desiccant packs in the Material Pod are dry, or replace them with dry ones
-
Optionally, place the label sticker that came with the material spool on the front of the Material Pod. This can help to quickly identify the type of material later
-
-
-
Secure the Material Pod lid by firmly pressing it into place ensuring that the outside is flush with the Material Pod on all sides. Take care when completing this step, an incomplete lid installation may cause damage to the filament due to moisture absorption
-
-
-
Press the Material Pod outlet into the Element Material Pod receiver until you hear a click
-
Use two hands to hold the Material Pod and ensure it is secure before leaving it in place
-
Once detected by Element, the light on the back of the Material Pod will flash green before changing to solid white to confirm a successful attachment
-
To check if the Material Pod is engaged and secured into place, lightly pull the pod without pressing the release button. It should not release easily.
-
-
-
Create a new printer profile by going to Printers > +New Printer > Preset
-
If you're using an LT Print Head, use the 'Element' profile. The 'Element HT' profile is only for use with HT Print Heads.
-
-
-
Visit the Projects menu. Click the +New Project button on the right.
-
-
-
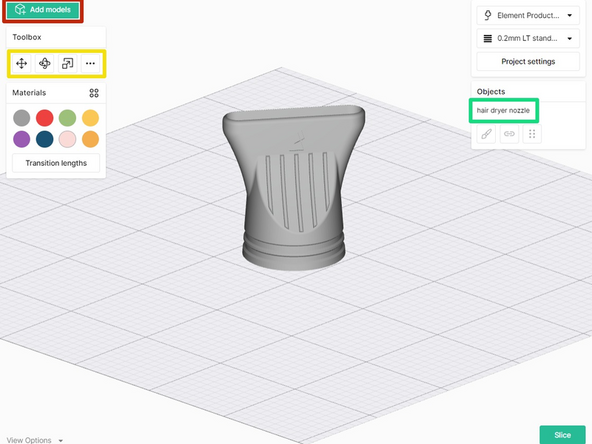
Click the Add Models button, or click and drag files from your file explorer directly into the browser.
-
STL files of up to 100MB are compatible with Canvas.
-
Use the toolbox to move, scale and rotate the model. More Options (...) will allow you to auto-arrange, lay a face to the bed, or drop the models to the bed.
-
Selecting the model in the Objects panel will allow you duplicate the model.
-
-
-
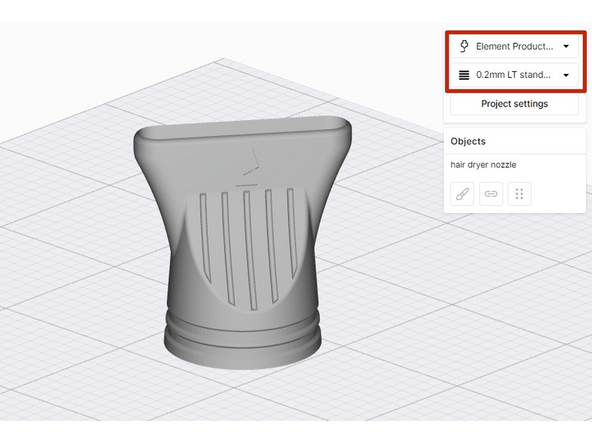
From the top-right menu, select the Element Printer profile and Style profile.
-
-
-
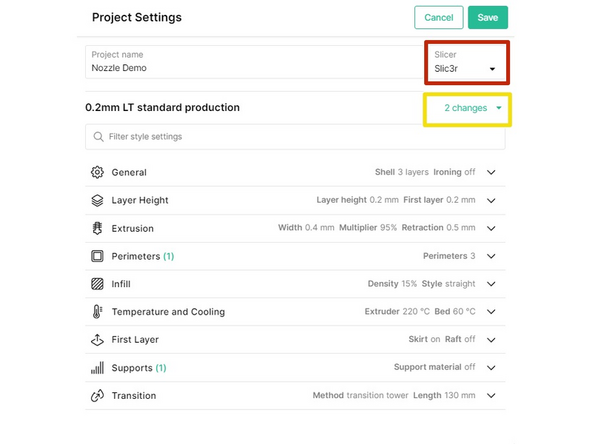
Open the Project Settings to adjust slicer settings.
-
You may select between the Kisslicer and Slic3r/PrusaSlicer engines.
-
As you tune and improve the printer profile, changes made here can be saved to an existing style profile, or a new style profile can be created.
-
-
-
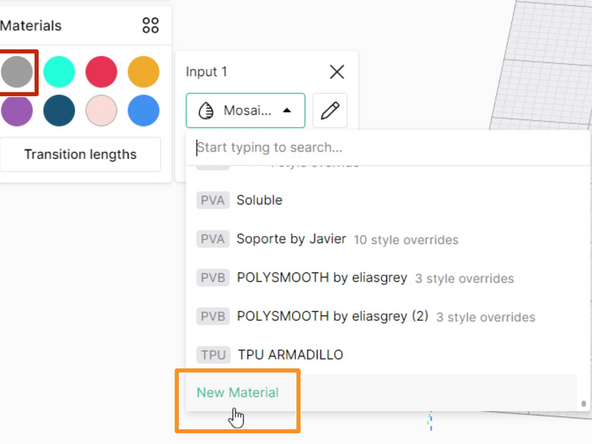
Start by selecting the color swatch under Materials, that will be used to color and visualize the part. Drag and drop this circular color swatch from the Materials panel over the STL or the file name in the Objects panel.
-
If you have not already created a material profile, you may create a new one by scrolling to the bottom of the Materials dropdown. Learn more on creating and managing material profiles here.
-
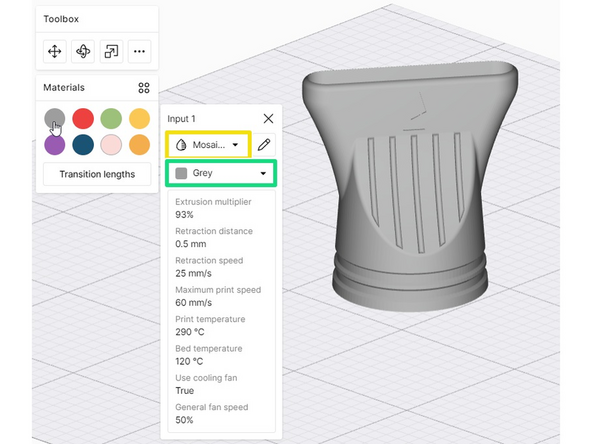
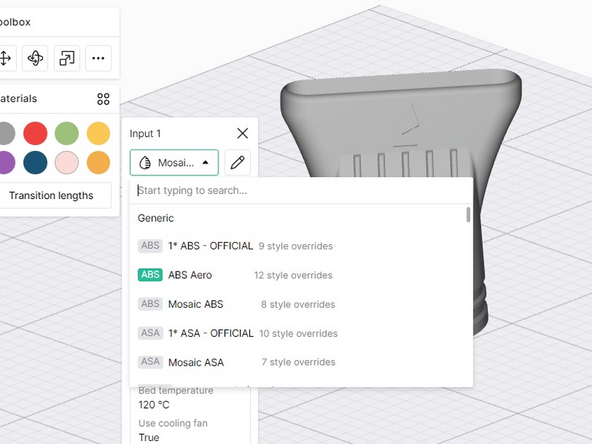
Next, select the material profile for that color swatch (e.g. PLA).
-
Green tags on material profiles indicate that they are a Mosaic material.
-
Lastly, select the filament color you would like to use for this material profile.
-
Third-party materials will allow for custom color selection.
-
The material profile and color selected here must match the material loaded to the Material Pod on Element/Array.
-
Third-party materials must use an NFC tag to be detected correctly by Element.
-
-
-
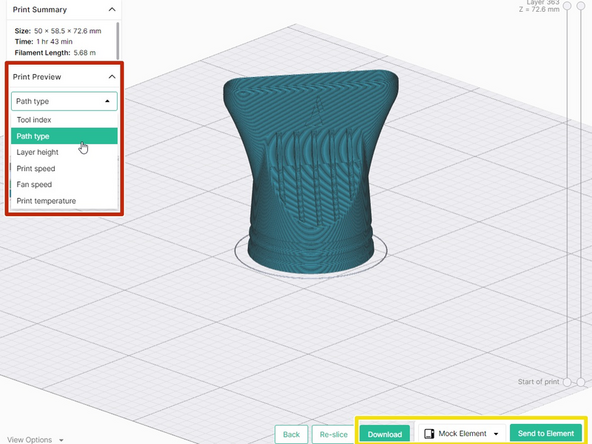
One slicing is complete, a preview of the part will be ready.
-
Use the print preview panel to view various toolpaths.
-
If Element was previously linked to your Canvas account and online, it will be available for receiving projects from Canvas. Click Send to Element, or download the file to transfer to a USB drive.
-
Sending to Element will not start the print automatically, but store the file on the printer.
-
-
-
Visit the Devices menu and double-click on the linked Element printer to view its status and controls.
-
Element must be connected to Internet and linked to a Canvas account in order to monitor Element on the web browser.
-
Here you can view Element's status, material levels, and files. Controls for temperature, axes and extruder movement are available.
-
Start from Canvas or Element screen: Select the file and then Start print.
-
-
-
Once the print has completed, allow the print bed to cool down.
-
Remove the bed surface from the skis in order to retrieve the part(s).
-


If you have any additional questions, please send us a message at support@mosaicmfg.com
If you have any additional questions, please send us a message at support@mosaicmfg.com
Cancel: I did not complete this guide.
4 other people completed this guide.
