
Introduction
This guide shows how to create submissions folders, review submissions and provide feedback in Canvas EDU.
For more detailed instructions, or support, contact support@mosaicmfg.com
-
-
Log in to Canvas EDU, click on the 'Submissions' tab and '+ New submission folder.' A submission folder is similar to a drop box for assignments.
-
In the 'General' tab you can set the folder name and a description that will be visible to all submitters.
-
You can also set submission requirements - students must meet these requirements in order to submit their project. More options for requirements may be added in future.
-
-
-
In the 'Permission' tab you can choose whether to allow repeat submissions from the same email, or not, and set a required email domain (if applicable).
-
In the 'Due Date' tab you can specify and date and time for the due date, and choose whether to allow late submissions or not.
-
If late submissions are allowed, a subsequent cut off deadline for late submissions can be set.
-
-
-
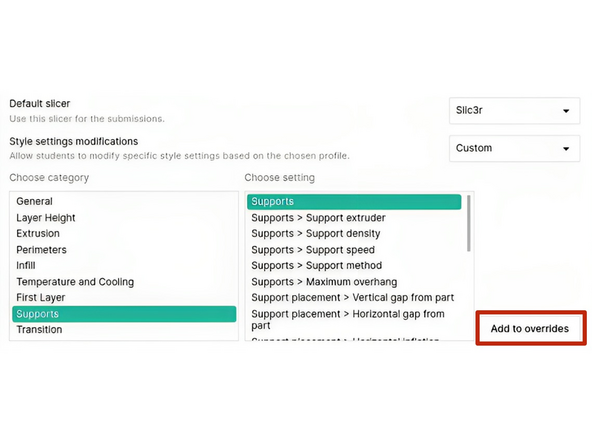
In the 'Printer Settings' tab the default printer profile, style profile and slicer are applied.
-
Style settings modifications is used to choose which settings students will be allowed to change in their project. It can be set to none, all, or custom. If custom, choose the relevant setting from categories and then click 'Add to overrides'
-
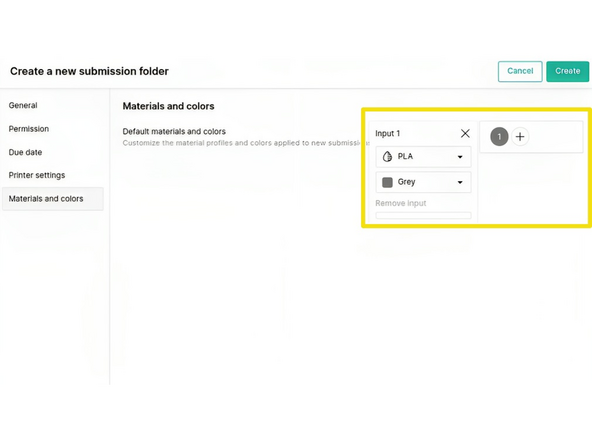
In the 'Materials and Colors' tab the material profile and color for the project is selected, and more materials can be added (when applicable)
-
Important: Please ensure that the same material and color selected for the submission folder, is also loaded onto Array using Material Pods, to ensure that the print job initiates correctly.
-
-
-
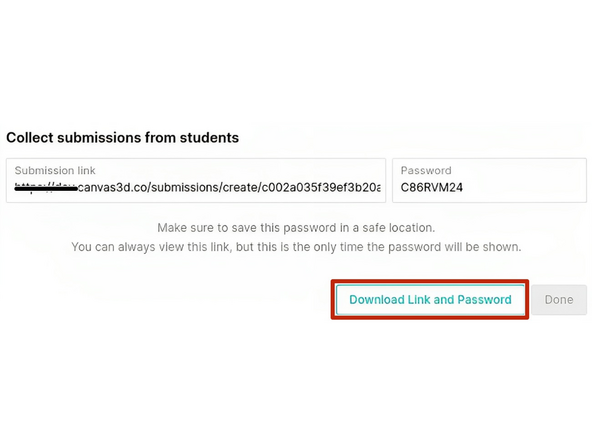
Click ‘Create’ in the top right when done to create the submissions folder and receive a link and password for the folder. You'll have the option to download the link and password in a txt file.
-
Share the provided link with your students for them to access the submissions folder. After they do, an email will then be sent to them with a separate link and password to access their individual submission, find any feedback and check their approval status.
-
-
-
Navigate to the relevant submission folder in the 'Submissions' tab.
-
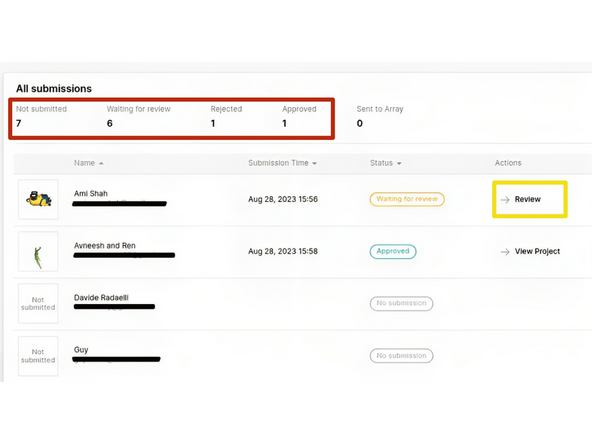
You will see a breakdown of all submissions in the folder, including details of how many projects have not been submitted yet, are waiting for review, have been approved or rejected, and have been sent to the printer.
-
In the 'Actions' column, click 'Review' to review a specific project.
-
-
-
Print Summary: see the size, print time, filament length and total number of splices for the print
-
Print Preview: preview the tool index, path type, layer height, print speed, fan speed and print temperature
-
Open Project: open the project in a separate tab for the full project UI, and to make changes if desired
-
Download Objects: download the .stl file(s)
-
-
-
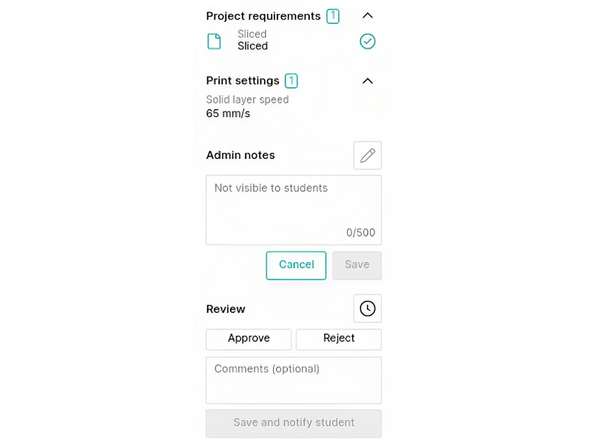
Project requirements: confirms that the requirements for the project have been met
-
Print settings: lists any settings that the student changed from default
-
Admin notes: any notes left in this section will not be visible to the student
-
Review: approve or reject the submission, and provide feedback to the student if desired. The student will be notified to access the submission to view the feedback. The clock icon will open the entire review history for the submission.
-
-
-
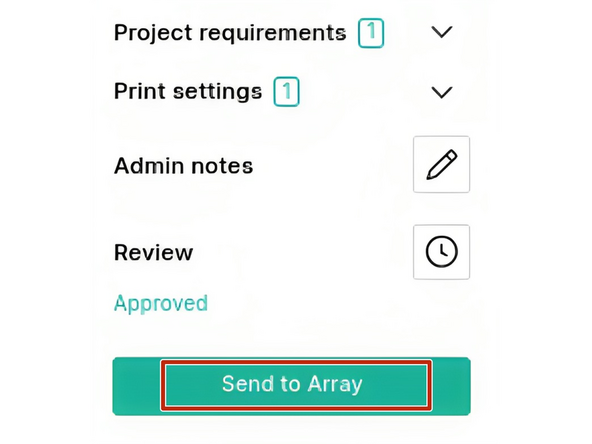
After approving a submission, the option to send to the printer will appear at the bottom of the feedback panel
-
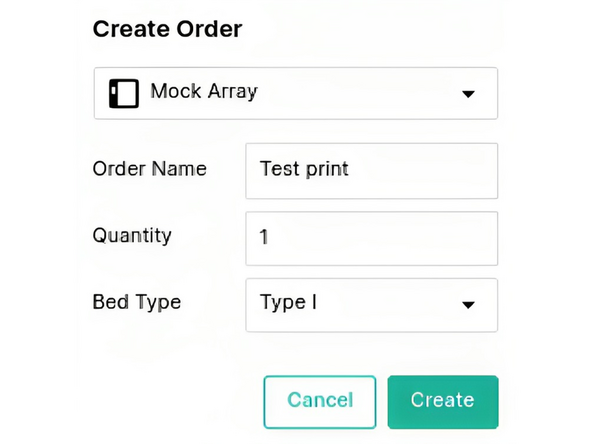
The Create Order window will open, with the following options: i) select the printer for this order ii) order name can be edited iii) quantity iv) bed type (Type II beds are intended only for high strength filaments, such as PEEK, PEKK and PEI 9068)
-
-
-
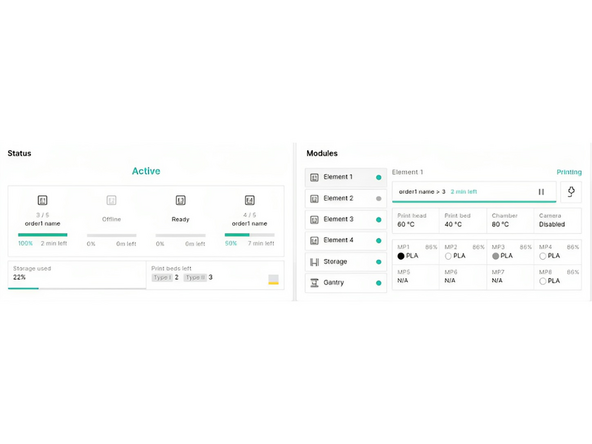
After sending to printer, navigate to the ‘Devices’ tab to monitor the print from the device control screen
-


If you have any additional questions, please send us a message at support@mosaicmfg.com
If you have any additional questions, please send us a message at support@mosaicmfg.com

Team
